
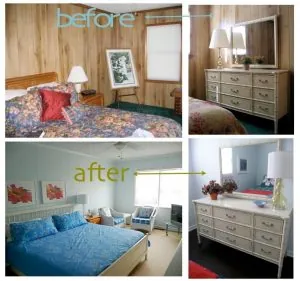
Nothing dates a home more than old ugly wood paneling. Ideally, a solution would be to tear it down and replace it with finished drywall. If your budget or time doesn’t allow for such a project don’t fret. We get several calls a year from frustrated home owners who want to update their walls and usually opt to paint over the existing wood paneling.
Preparation
There are a few steps to ensure you get the best results when painting paneling. First, make sure you have proper ventilation. Clear out the room and cover all flooring. All holes and other blemishes need to be filled with spackle or joint compound. If the paneling has any shine it needs to be sanded to ensure proper adhesion of paint and will create a smooth finish. An orbital sander could be your best friend during this step.
Once sanded, clean the walls of all sanding debris. TSP is a wonderful product to use and will further remove any grease or tough dirt.
Next is the primer application. It is vitally important to get a good coat of primer applied as without priming the finish paint will not adhere and you’ll be left with unsightly paint chipping. It is a good idea to have your primer tinted to the color of your finish paint.
Paint
Finish your project by applying that beautiful new color you’ve been imaging on you walls. Hopefully it will create a dramatic new look in your space that will make your home even more inviting.
Pingback: My Homepage